How To Apply Peel And Stick Marble Vinyl Onto Tile Countertops (Without Lumps!)
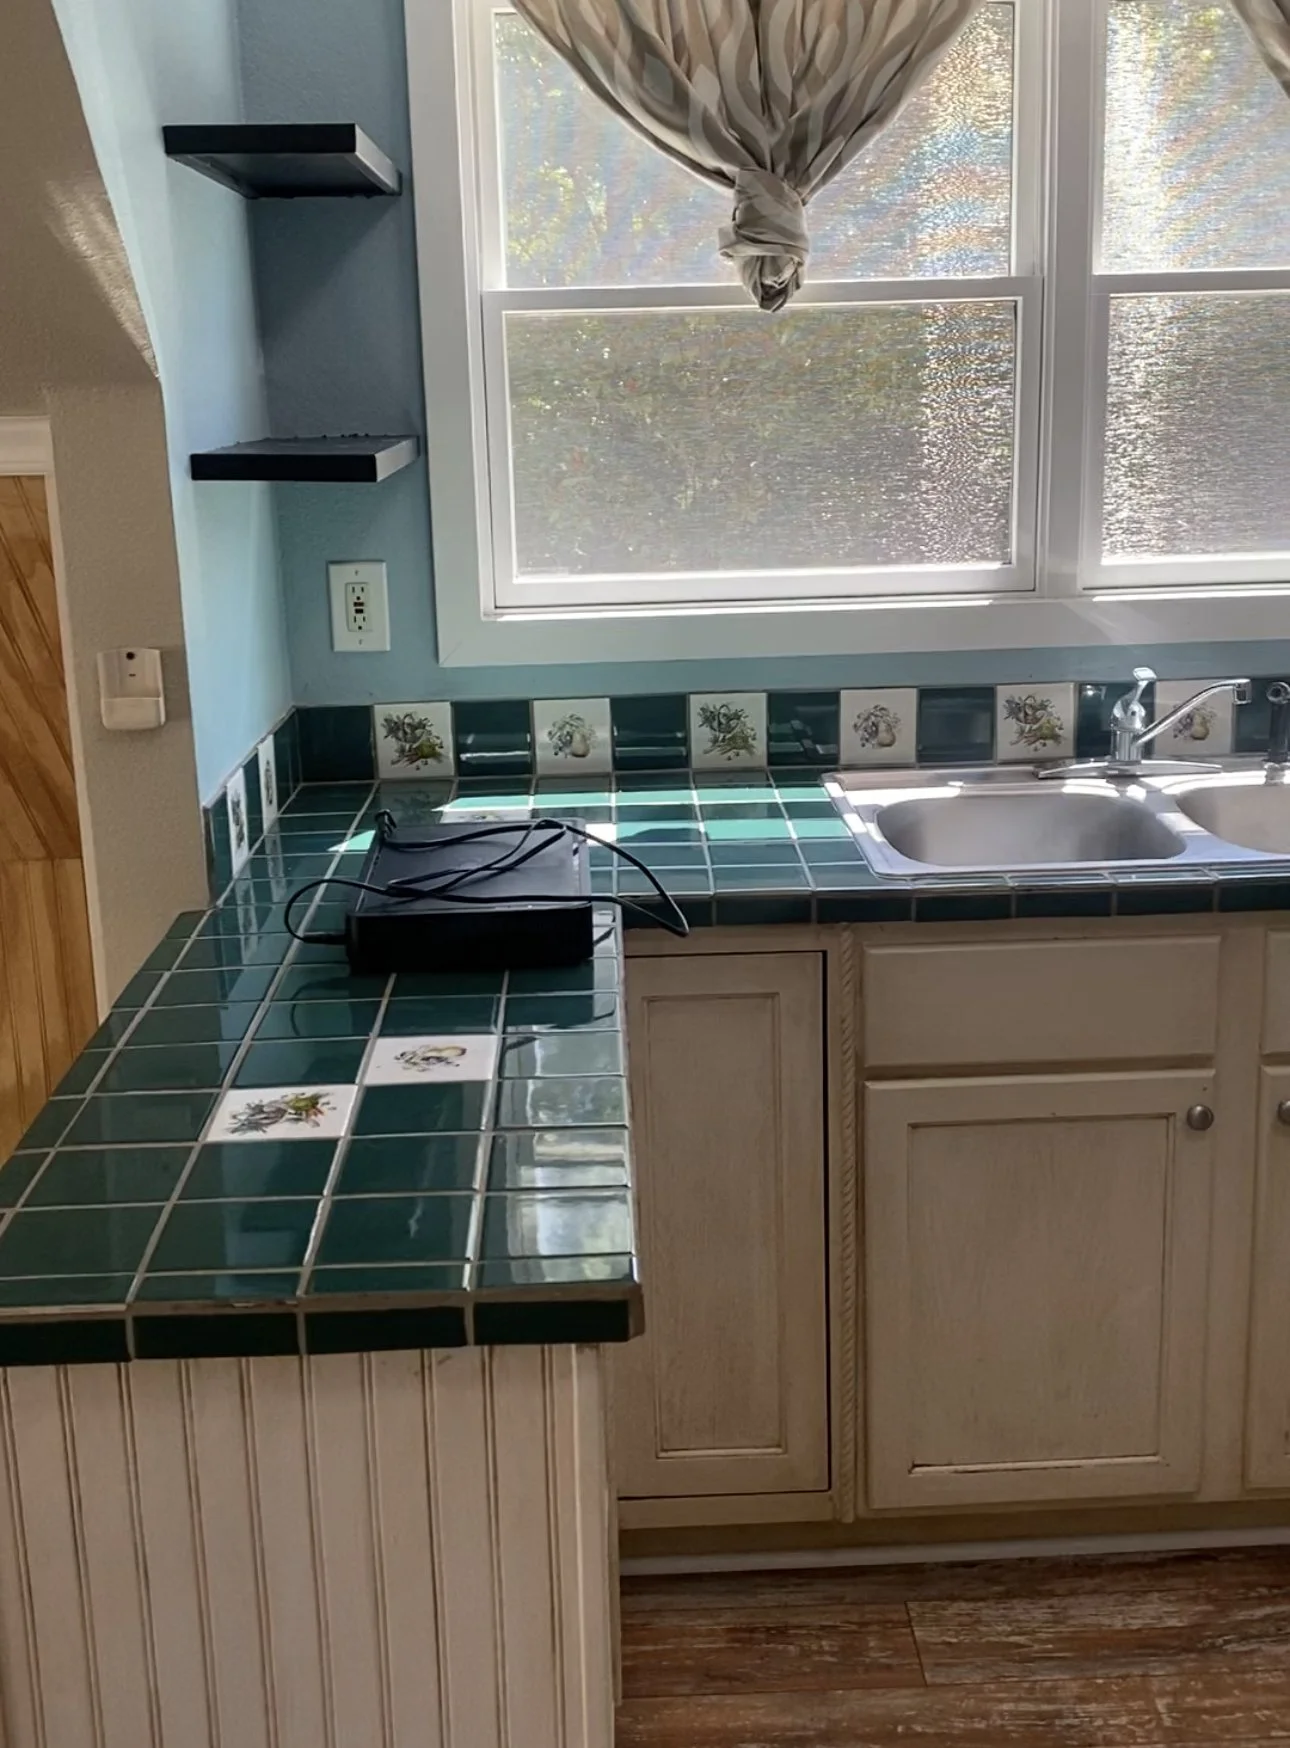
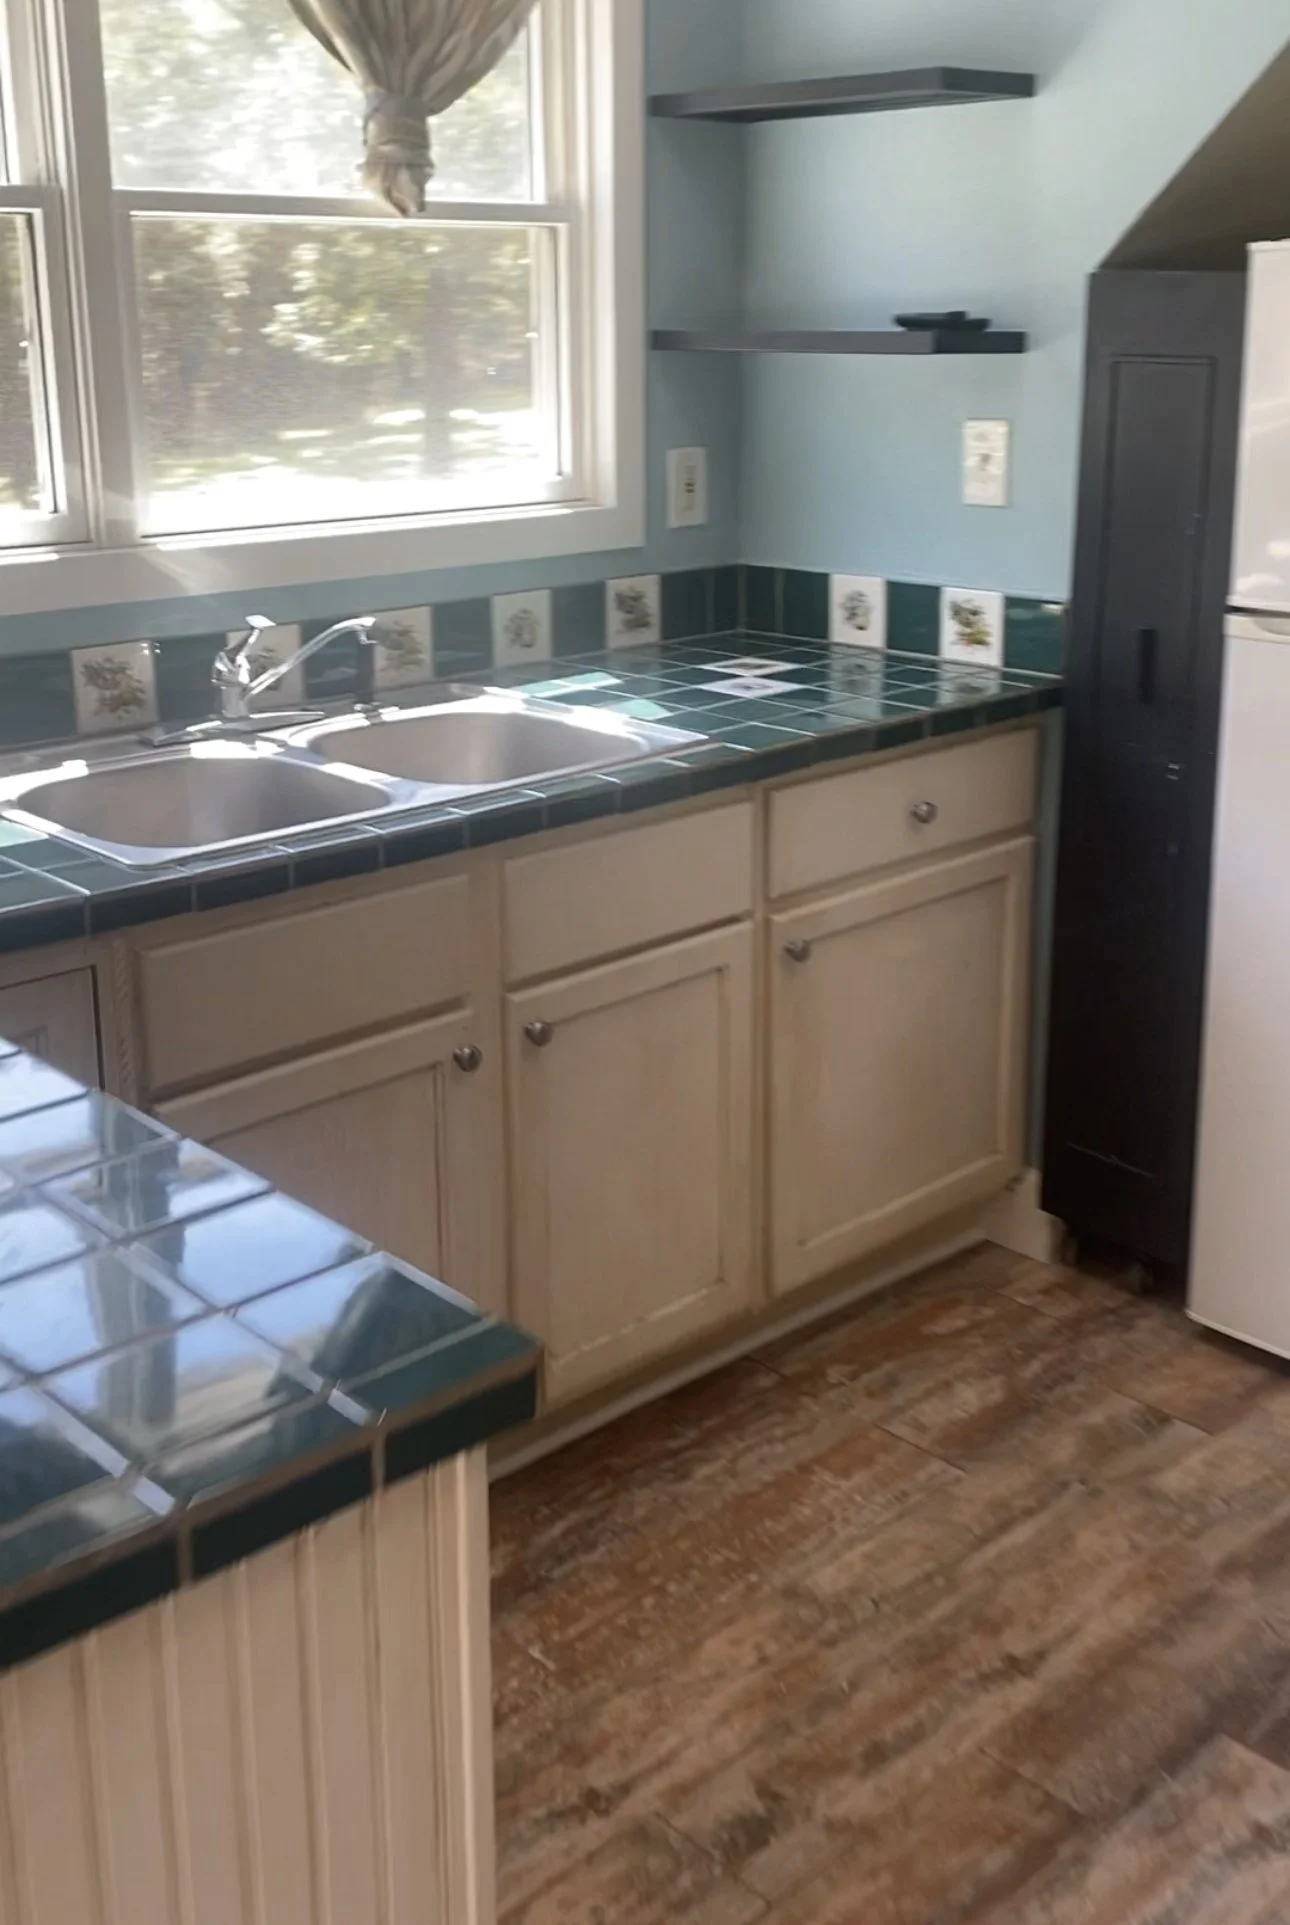
I recently began renovating our above-garage apartment. It included a very outdated kitchen. I was quoted thousands to replace the countertop with even the cheapest materials. I knew painting was an option, but I didn’t want the tile texture and grout lines to be visible through the paint. I saw a few videos showing peel and stick counters, but they often looked extremely lumpy if it was applied directly over the tile.
I decided to tackle something I’ve never seen done before… covering my old tile countertops with peel and stick marble vinyl/wallpaper using caulk to smooth out the texture underneath. It turned out phenomenal! Let’s break down how it came to be...
Here’s a link to everything I used in the above video and below instructions.
This article contains affiliate links, but was not sponsored in any way.

Step 1. Clean your tile countertops.
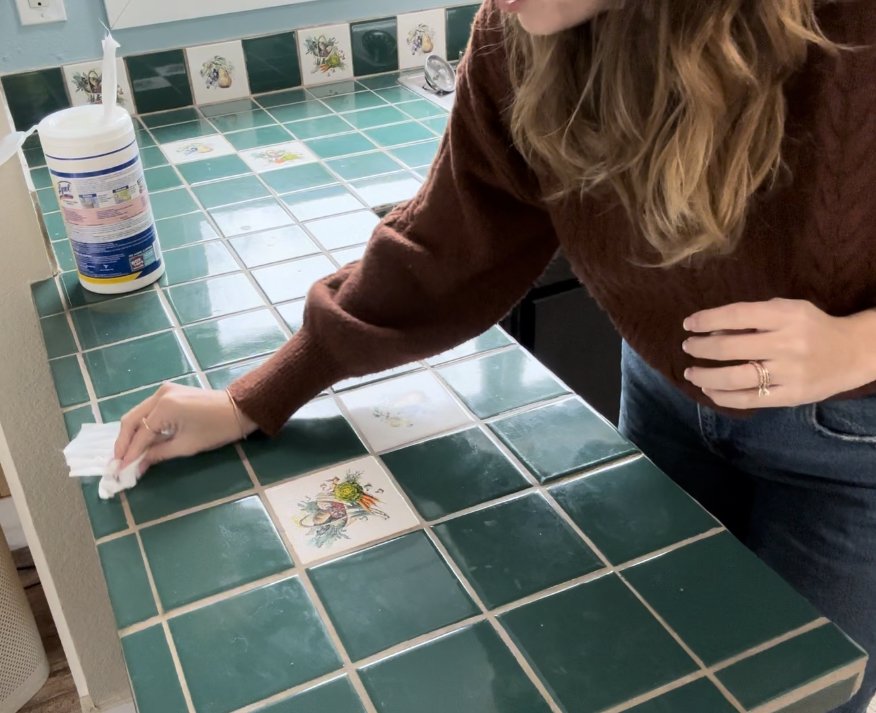
You don’t have to go crazy on this step. I got by just fine with some Lysol wipes. Just make sure whatever you use is getting the grout lines, cracks, corners, and gaps clean as well. Caulk and vinyl won’t stick well to dirt, crumbs, or dust.
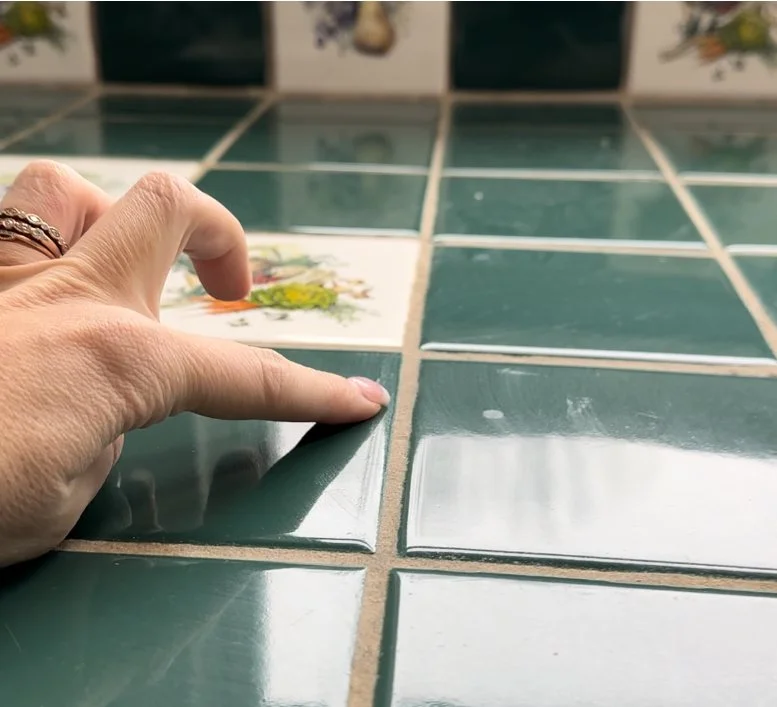
Step 2. Use caulk to smooth out the grout lines.

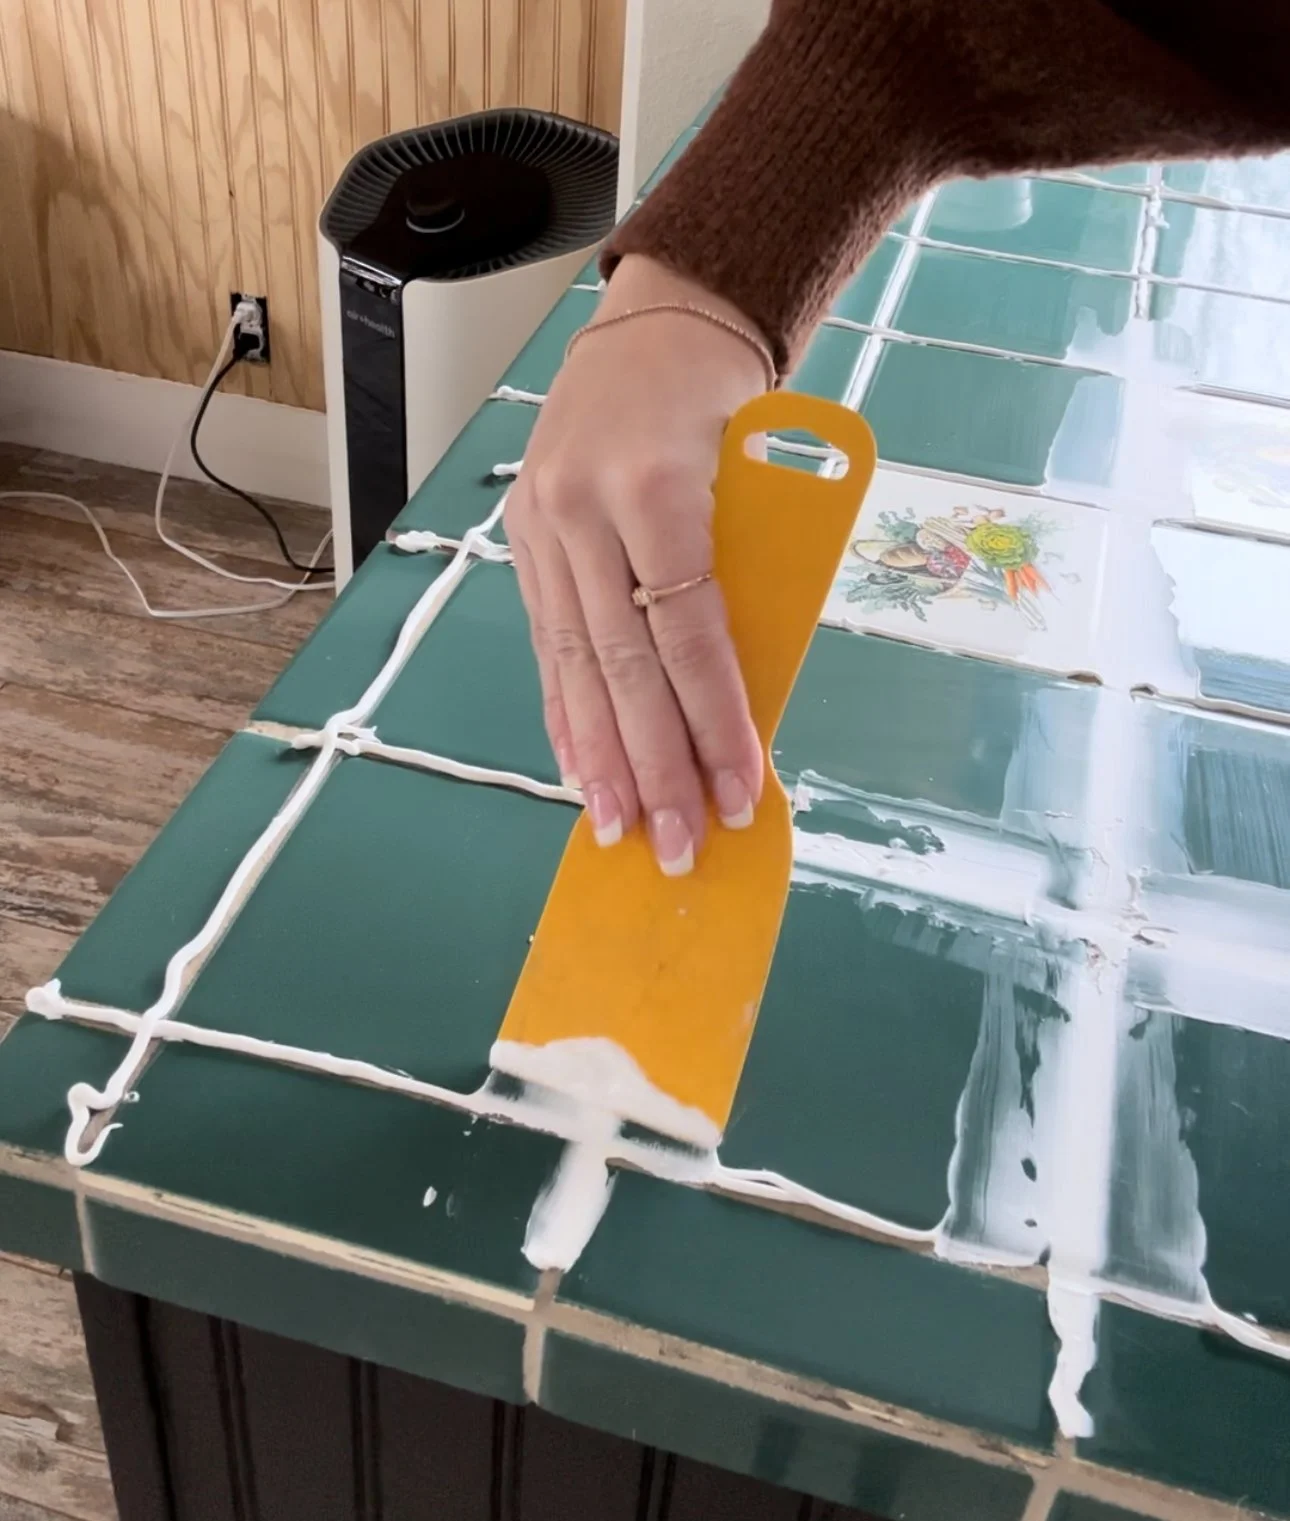
I recommend using a caulk color similar to your original tile. (I made the mistake of using white caulk with dark green tile which showed through the thin vinyl— more on that later.)
You’ll want to do a line and immediately use a smoothing tool (like this one) to smooth it out. It’s better to overfill the gaps. Not using enough will not successfully hide the gaps.
From trial and error, I realized to do all of the lines in one direction first. Let those fully dry before doing the intersecting lines. You don’t have to spend a ton of money. My entire countertop (which isn’t giant, but isn’t tiny) only took about 1.5 containers of caulk. I used this kind which is very cheap online and in stores.
Step 3. Sand with a 220 grit and clean up again.
This step removes the bumps from imperfect caulk. Next up is applying the peel and stick, so you’ll want a very clean and smooth surface. To avoid too much dust, I sanded by hand with a 220 grit sheet of sandpaper. Don’t go crazy with a power tool.
Step 4. Apply your vinyl.
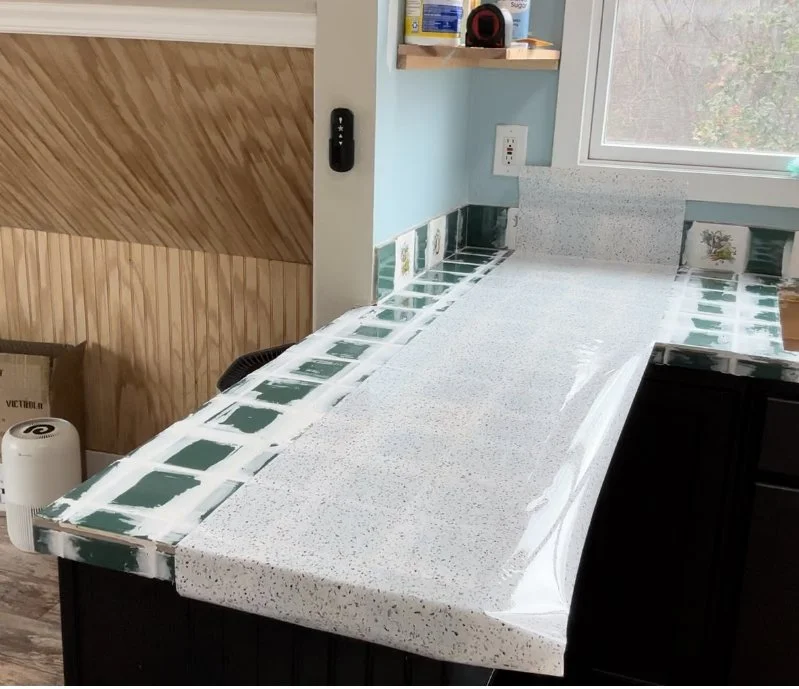
I ordered this vinyl. I’ve used it twice on counters now. It’s thicker than peel and sticky wallpaper and is very slippery which makes clean up a breeze. I had to use two coats of the faux marble countertop to hide the dark green and white lines underneath.
Again, I recommend using a caulk that is similar to the color of your tile so maybe you can skip a second layer of peel and stick.
Go slow and order more than you think you’ll need. You can use a wallpaper smoothing tool (like this one) to get it on smoothly.
Apply the paper tight. If you feel a potential bump from a grout line, apply the paper to one side of the tile, pull tightly and apply it to the other tile. DO NOT push down on the grout lines. Pulling the vinyl tightly over the grout lines helps hide them.
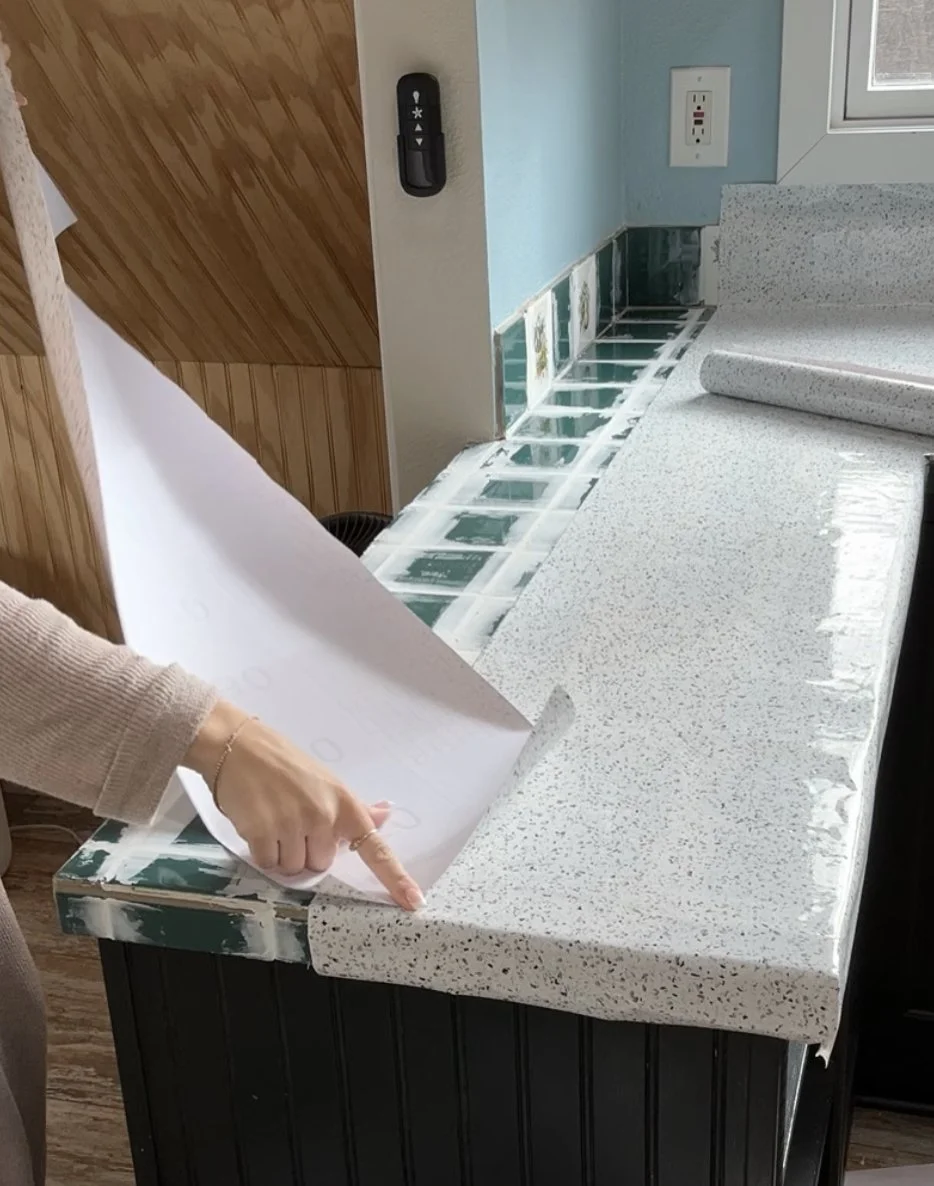
Step 5. Make sure the edges are straight.. even if your tile isn’t!
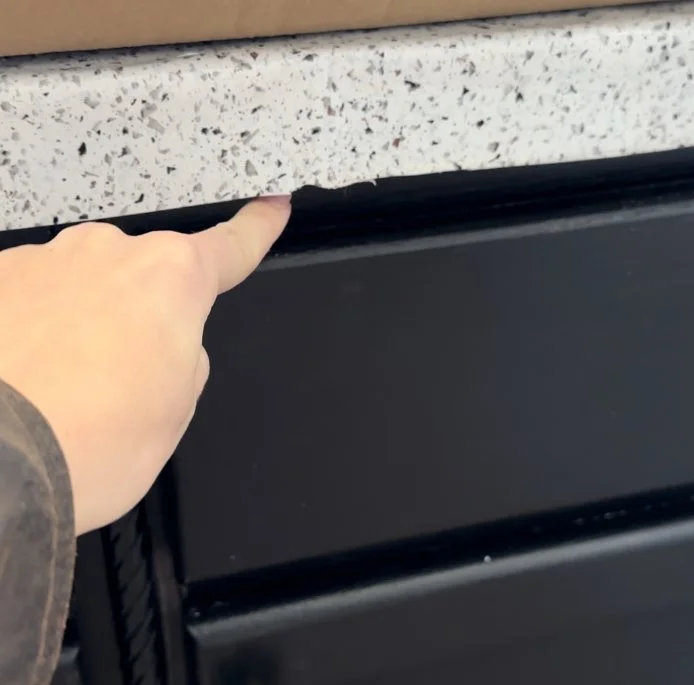
Don’t cut along your tile and expect a straight edge. Tile is lumpy. Cut a straight edge from the wallpaper and make THAT be the bottom of the counter— even if it hangs down a very centimeters below the actual tile.
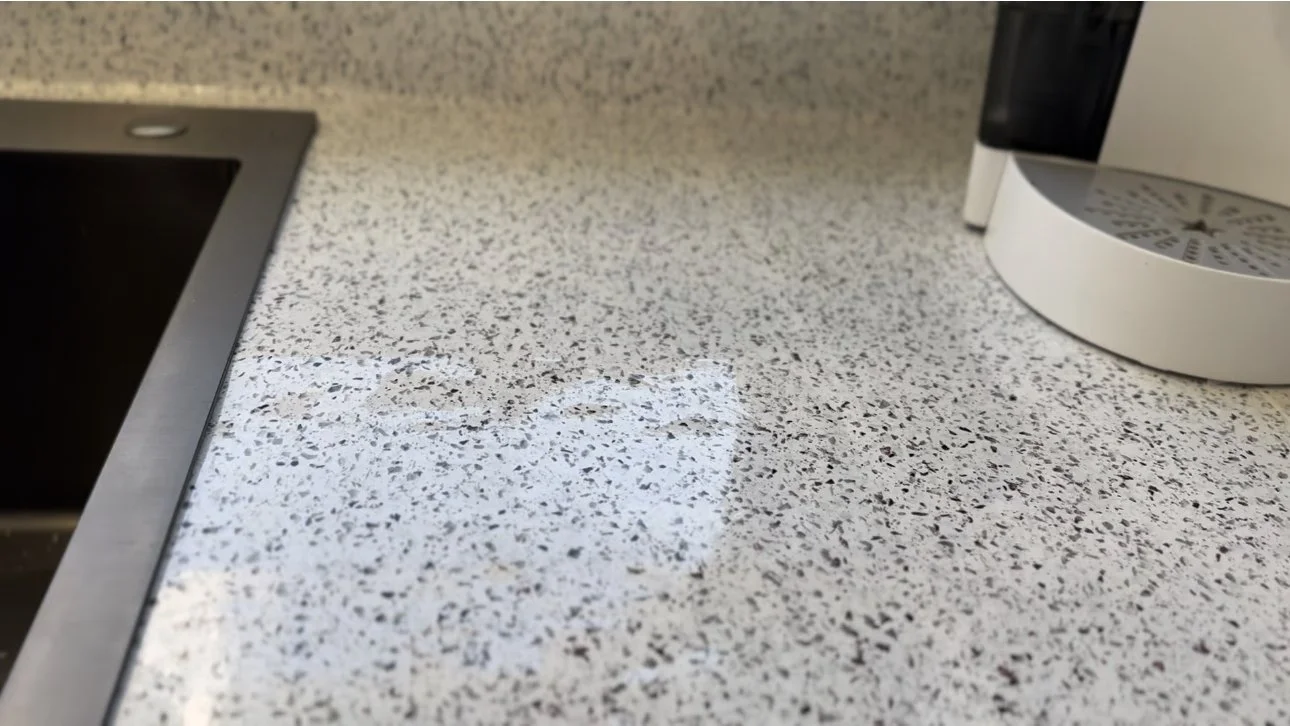
See the photo for what it looks like if you skip this step.
Step 6. Caulk the edges and seams.
Again, this caulk is very affordable. This will prevent mold, peeling, and will make the finished product look more cohesive.
Step 7. Enjoy the finished result!
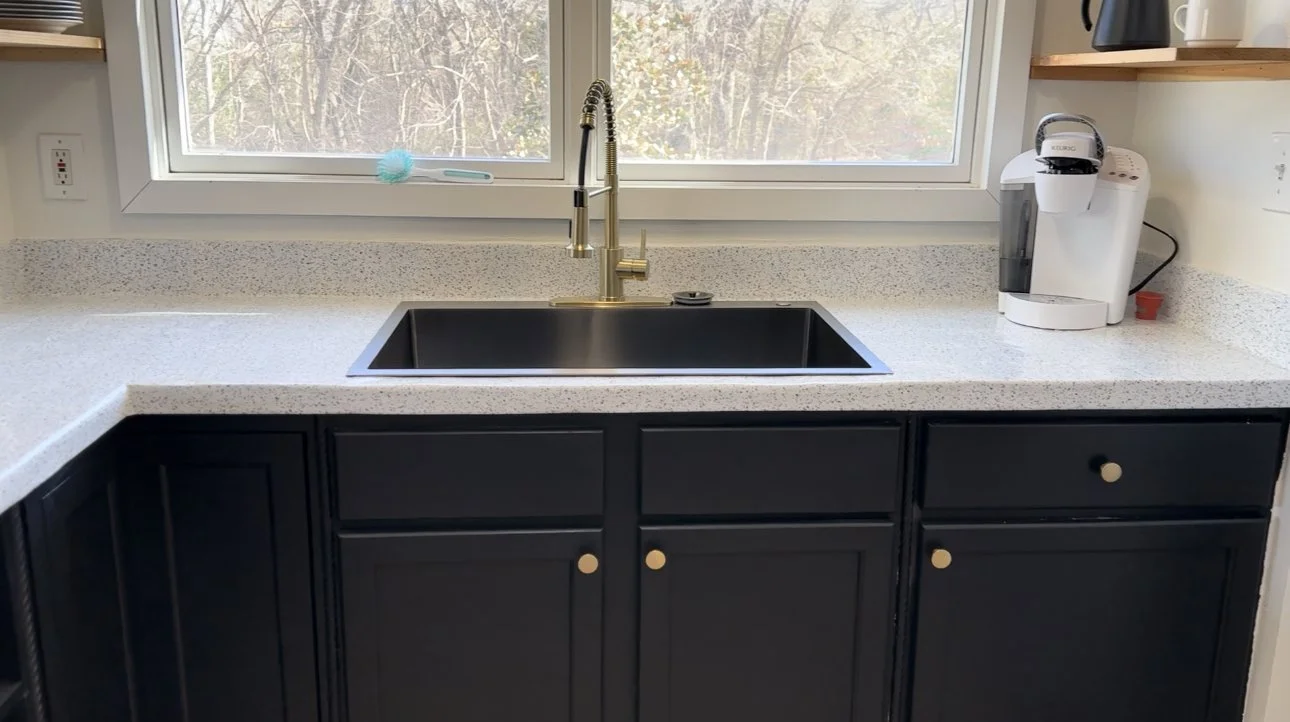
I’m so beyond thrilled with how this project turned out. It may not last FOREVER, but I did this same process in a bathroom over a year ago and it’s still like new! I’ve had followers tell me the same thing.
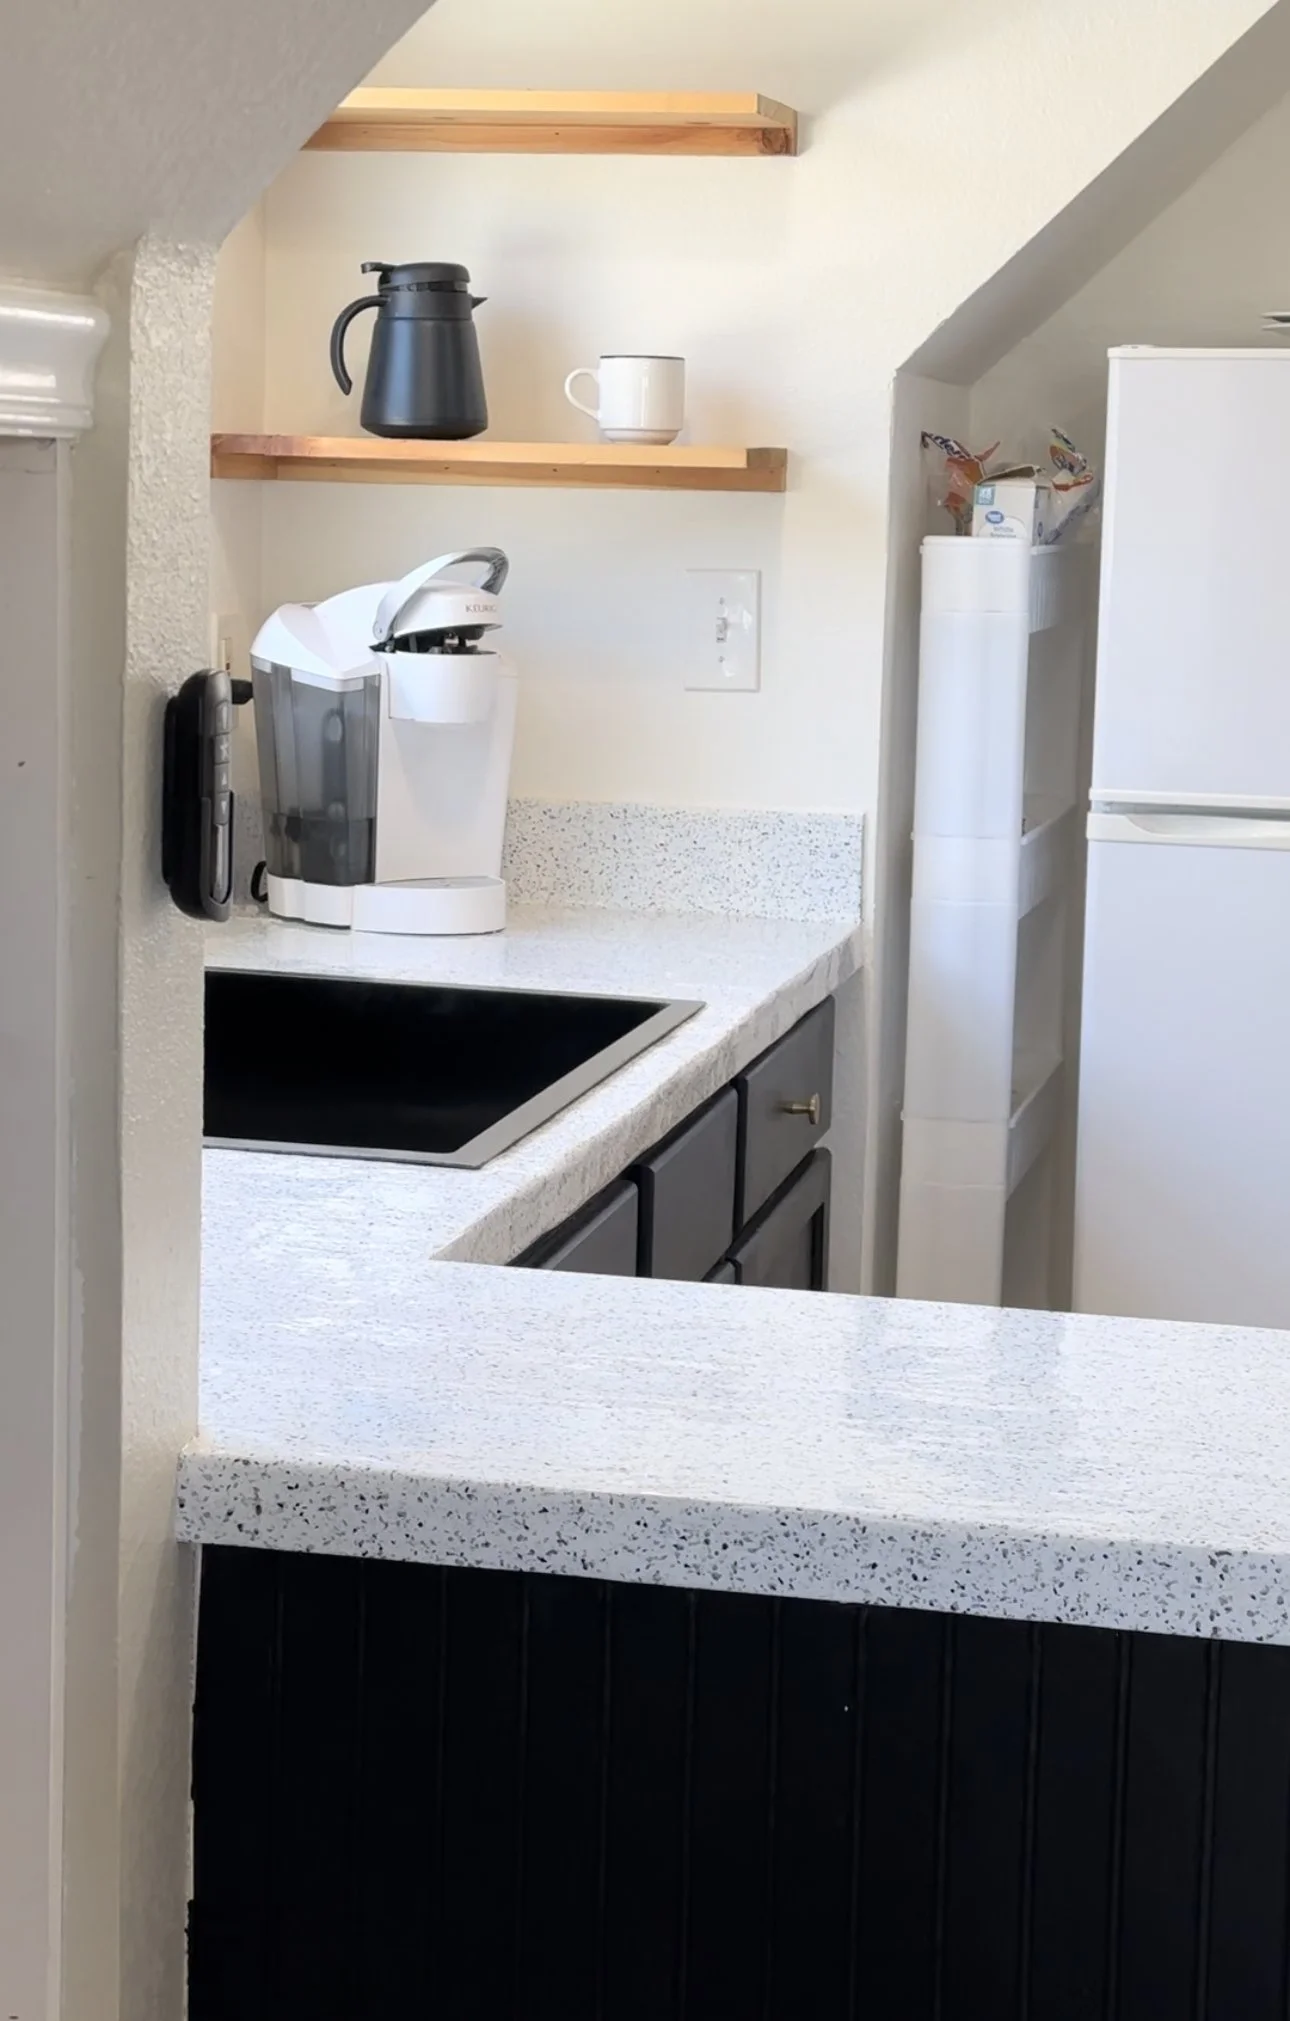
If you’re on a budget and want to skip paint, this is a great way to upgrade those old, outdated tile countertops. Whether it’s your kitchen or bathroom, give this project a try and let me know how it works out!
I hope this blog (and these photos) inspire your next project. If you’re ready to take your furniture makeover skills and home projects to the next level (on a budget), follow me on Instagram.